



When creating reports using Crystal Reports, setting the paper size is one of the important steps that is often overlooked, yet it has a significant impact on the printed output and report appearance. If the paper size is not configured correctly, the report may be cut off, appear disproportionate, or display differently when printed compared to the preview.
How to Configure Paper Size in Crystal Reports
Follow these steps to properly configure the paper size in Crystal Reports.
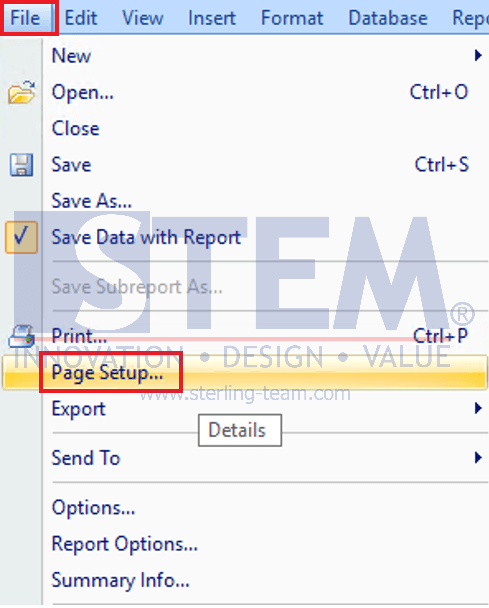
- In Crystal Reports, click the File > Page Setup
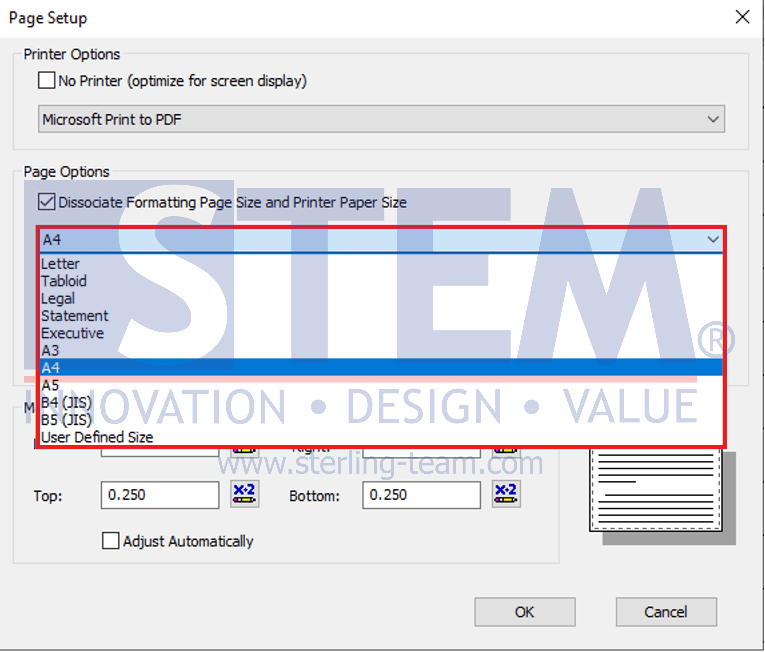
- Select one of the available paper sizes. In the Page Setup window, several standard paper sizes are provided, such as A4, Letter, Legal, and other available options.
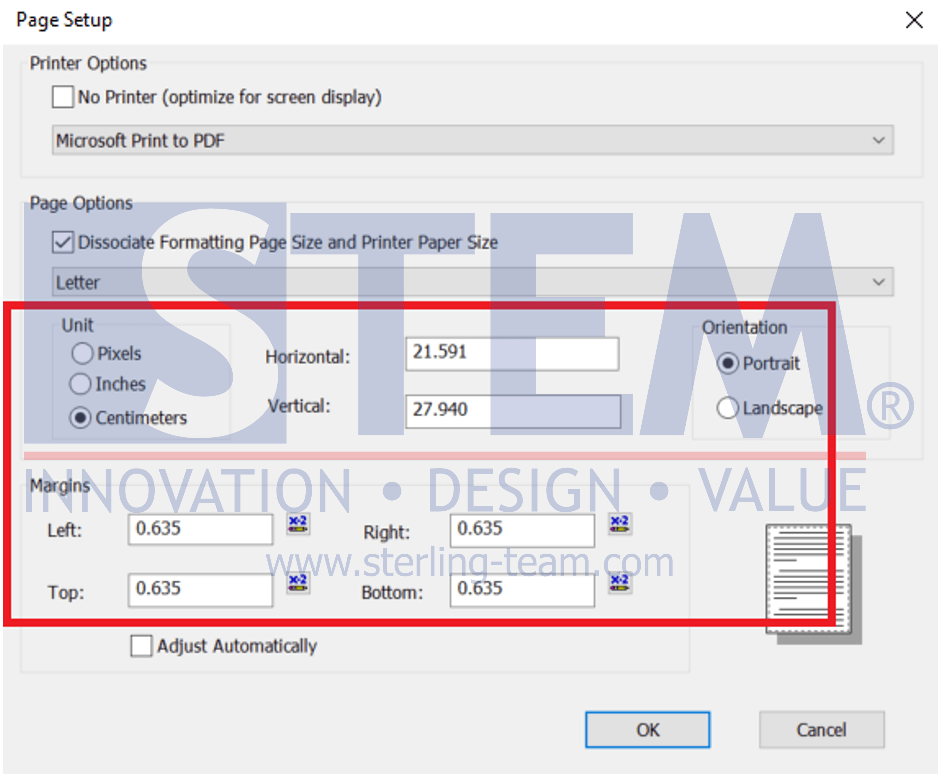
- If the standard paper sizes are not sufficient, users can define a custom paper size. In this section, users can:
- Specify the unit of measurement (pixels, inches, or centimeters)
- Set the paper width and height using the Horizontal and Vertical fields
- Choose the paper orientation (Portrait or Landscape)
- Adjust the margins (top, bottom, left, and right) to prevent report content from being cut off
Custom paper size settings are particularly useful for reports with special layouts, such as label forms, customized forms, or reports with wide tables.
- Click the OK button to save the changes. Crystal Reports will automatically adjust the report layout based on the selected paper size and configuration.
Also read relevant SAP Business One Tips:
- Print Login User Name in SAP B1 Crystal Report
- Add Print Time to SAP B1 Crystal Report Layout Easily
- Set Background Color for Sections in SAP Crystal Report
- Fix Error When Previewing or Printing Crystal Report
- Printing and Previewing Documents in SAP Business One Web Client
- How to Use Can Grow in Crystal Report SAP B1